Warning: This procedure erases all data on the iPod, and formats it for Macintosh
computers. Verify data backup.
Important:
Make sure you have completed the earlier Computer setup procedures, before
continuing.
1. (With the iPod shuffle NOT connected to the computer) reset it by setting the switch on
the back to OFF for five seconds and then set it to either play in order or shuffle
songs .
Note:The status light should show solid green for a few seconds.
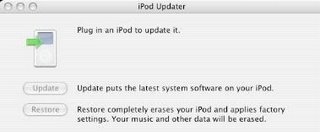
2. Launch the latest release of iPod Updater on the computer. Wait until you see the
message “Plug in an iPod to update it.”

3. Quit iTunes if it is open.
4. Plug the iPod shuffle into a high-power USB port on the computer.
Notes:
• Use a USB 2.0 port for faster music transfer speeds.
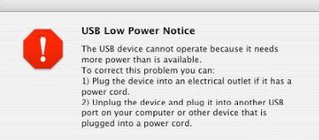
• Battery charging will be verified, so a high-power USB port must be used.The iPod
shuffle can only be charged via a high-power USB port (USB ports on the keyboard
are not high-power so they cannot be used). If the port does not have enough
power, the following notice will appear.

5. The iPod shuffle should begin blinking orange — do NOT disconnect it.
Important:
Whenever the iPod shuffle status light blinks orange, it indicates that the
iPod shuffle is mounted to the Desktop and must be ejected (the status light will stop
blinking) before it can be disconnected from the computer.
In this case, whether the iPod shuffle has been enabled for disk use or not, iPod
Updater mounts the iPod shuffle on the Desktop.
Note:
If the iPod Updater screen says that the attached iPod model is not supported
by this application, quit iPod Updater and launch iPod Updater 2005-01-11 or later.
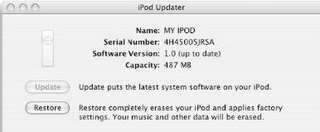
6. The iPod Updater window displays the iPod shuffle name, serial number, software
version, capacity, and the Restore button is available. Example shown here:

Note:
The approximate Capacity for the following iPods should be:
• iPod shuffle (512 MB): 500 MB
• iPod shuffle (1 GB): 1 GB
7. Click Restore. Click Restore again, when it asks you if you are sure.
8. Enter your name and password in the Authenticate screen.
A progress bar appears.

9. When the progress bar completes, the message “Your iPod has been restored..., and
is restarting.” appears.
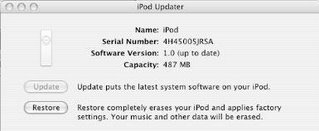
10. Wait until the iPod Updater window displays the iPod name and serial number screen.

11. Quit the iPod Updater. The iPod has been Restored. Do not disconnect it.

No comments:
Post a Comment